
Interview stages
Add interview rounds on a Career, choose how candidates book, and set shared scheduling options.
An interview stage is one round on a Career. Each stage can have its own interviewer and booking method.
Before you start
- You must be signed in.
- These plans include this feature: Hire, Hire + Retain, and Enterprise.
- These roles can change interview stages: Owner, Administrator, Hiring Manager, and Office Administrator.
- If you are a Hiring Manager, you can change stages on a Career when you are the hiring manager for that Career.
- If you are an Office Administrator, you can change stages on a Career when it includes an office that you administer.
View Interview Schedule
- Open Hire, then open Careers.
- Select the Career title. This example uses Store Associate.
- Select Settings.
- Select Interview Schedule.
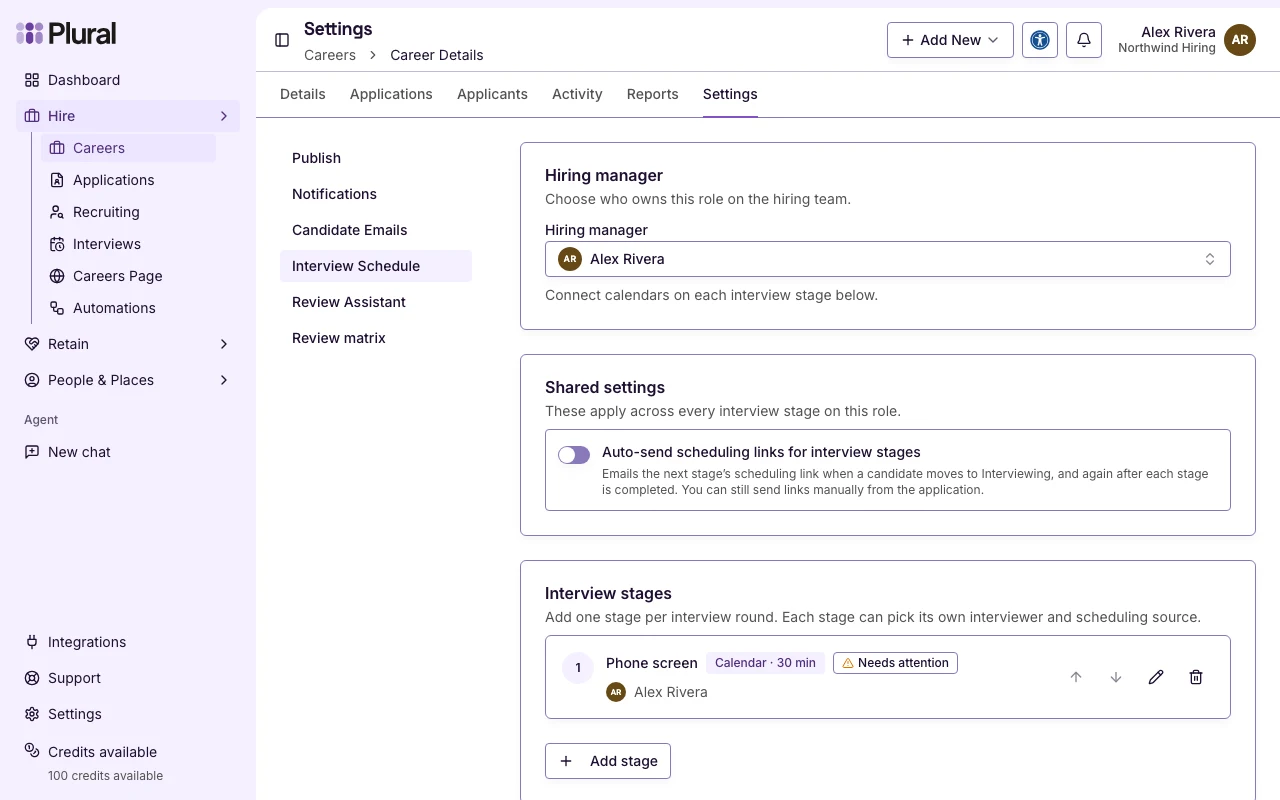
Hiring manager
Hiring manager is at the top. Choose who owns this role on the hiring team.
- Open Hiring manager.
- In Search…, type a name if the list is long.
- Select the person. Select No hiring manager if you do not want to assign one.
The page saves the change. A success message shows: Hiring manager updated.
You can also set the hiring manager from Edit open role. See Give someone ownership.
Shared settings
Shared settings apply to every interview stage on the Career.
- Turn on Auto-send scheduling links for interview stages if you want Plural to email the next scheduling link when a candidate moves to Interviewing, and again after each stage is complete.
- You can still send a link from the application when this setting is off.
A success message shows: Shared settings saved.
Add an interview stage
If the Career has no stages, select Set up interview stages. If the Career already has stages, select Add stage.
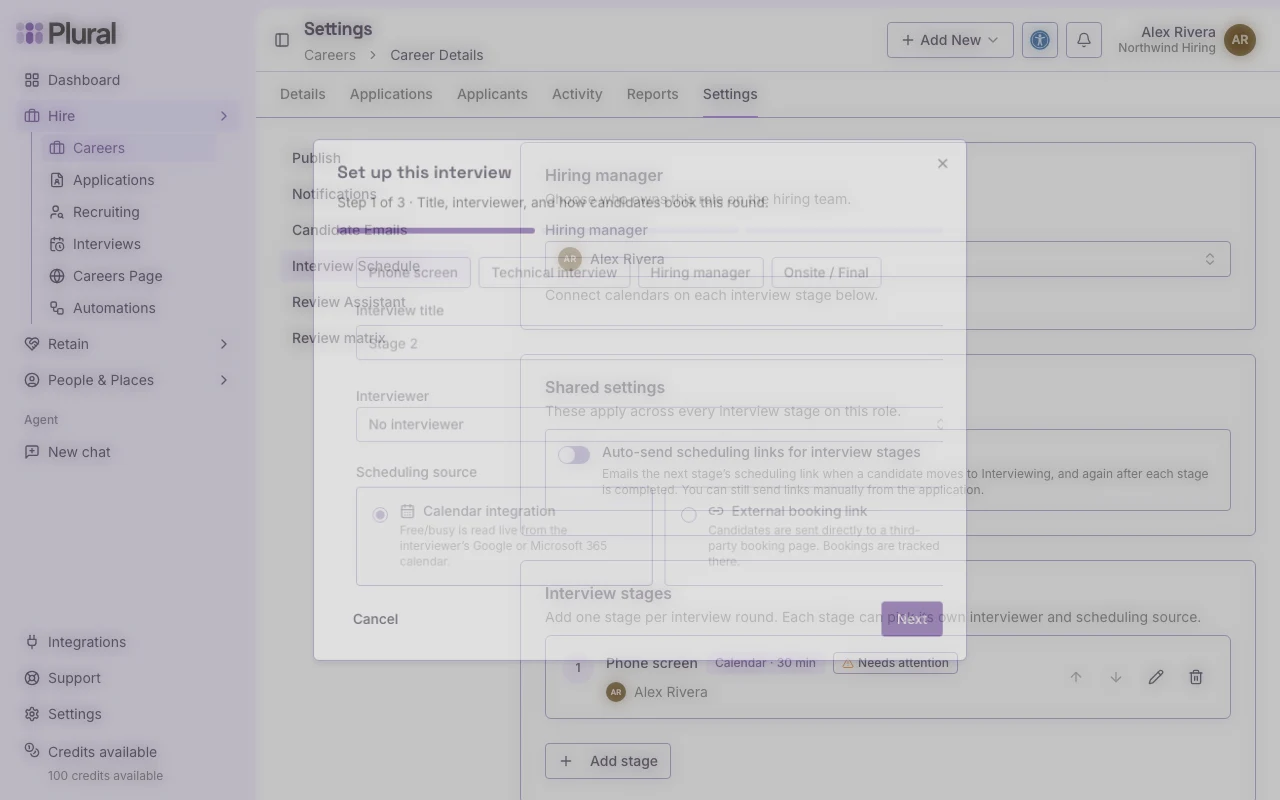
The first wizard page title is Set up this interview.
Set up this interview
- Select a title chip if you want a common name: Phone screen, Technical interview, Hiring manager, or Onsite / Final.
- In Interview title, type the name of the round. The title is required. The title can have up to 120 characters.
- In Interviewer, select the person. Select No interviewer if you do not want to assign one.
- In Scheduling source, select how candidates book.
- Calendar integration — candidates pick a time from the interviewer calendar. The interviewer must connect Google Calendar or Microsoft 365.
- External booking link — candidates open a booking page that you provide.
- Select Next. Select Cancel to close the dialog.
If the title is empty, the form shows: Interview title is required.
Set availability
This page appears when Scheduling source is Calendar integration. The page title is Set availability.
- In Slot length, select
15,25,30,45,55, or60minutes. - In Booking window, select how far ahead a candidate can book. Options include Same day, 1 day ahead, and 14 days ahead.
- In Timezone, select the timezone. Working hours use this timezone.
- In Working hours, select Weekdays 9–5, Weekdays 8–6, or Custom.
- If you select Custom, turn on each day you want. For each day, set Start and End.
- Select Next. Select Back to return to the first page.
Add a booking link
This page appears when Scheduling source is External booking link. The page title is Add a booking link.
- In Booking URL, type a URL that starts with
https://. - Select Next.
If the URL is empty, the form shows: Booking URL is required for external mode. If the URL does not start with https://, the form shows: Booking URL must start with https://.
Review and save
The last page title is Review and save. The page shows Stage, Interviewer, and Scheduling.
- Read the summary.
- Select Save stage.
A success message shows: Interview stage added. When you edit a stage, the message is Interview stage updated.
Stage order
Each stage row has Move stage up, Move stage down, Edit stage, and Remove stage.
- Select Move stage up or Move stage down to change the order. A success message shows: Interview stages reordered.
- Select Edit stage to open the wizard again.
- Select Remove stage. Read Remove stage? Then select Remove. Select Cancel if you do not want to remove the stage.
A success message shows: Interview stage removed.
If a stage still needs a calendar or a booking URL, the row shows Needs attention.